Configuring the Superuser, On-Prem Server Profile, and Repository Server
Navicat On-Prem Server is an on-premise solution for hosting a cloud environment where you can securely store Navicat objects internally at your location. It's one of two Navicat products whose goal is to foster increased collaboration amongst team members - the other being Navicat Cloud. The main difference between these two solutions is the location of shared objects: in the case of Navicat Cloud, they are stored in a central location on Navicat's servers, whereas the Navicat On-Prem Server resides on your organization's infrastructure. That being said, you can also install Navicat On-Prem Server on Amazon Linux 2 or within a Docker container. Today's blog will cover the first steps for configuring Navicat On-Prem Server on Windows 10 with a MySQL 8 Community Server instance. The next blog article will complete the series with the remaining steps.
Starting and Stopping Navicat On-Prem Server
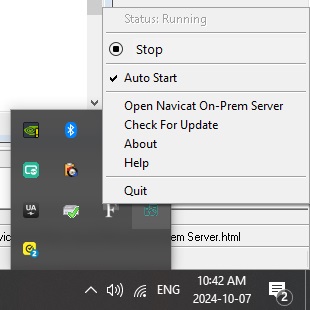
After the installation, Navicat On-Prem Server starts automatically. You can configure this behavior via the taskbar icon:
Right-clicking the icon will open the context menu. There, you can start & stop Navicat On-Prem Server as well as enable or disable the Auto Start feature:
The Welcome Page
After you have installed Navicat On-Prem Server and start it for the first time, a browser will pop up and open the Welcome page of your Navicat On-Prem Server at http://<your_ip_address>:<port_number>. The host address is the host name of the system that installed Navicat On-Prem Server, and the port number is 3030 by default. Hence, the server URL will usually be "http://127.0.0.1:3030/".
On the Welcome page, we can either click the Setup On-Prem Server button to complete the basic configuration of Navicat On-Prem Server or import existing settings if we already have a Navicat On-Prem Server.
We'll enter the configuration details manually since this is our first installation. There are six sections to fill in:
- Superuser
- On-Prem Server Profile
- Connect to Repository Server
- App Server
- Notification Settings
- Confirmation
The next several sections will cover the first three points above.
Create the Superuser Account
Superuser is a local user (Admin) account which has unlimited access to Navicat On-Prem Server functionalities. You may supply the following profile information of the superuser: Username, Password, Full Name, Email, Mobile Number, Preferred Language and Appearance. You can also upload a profile photo:
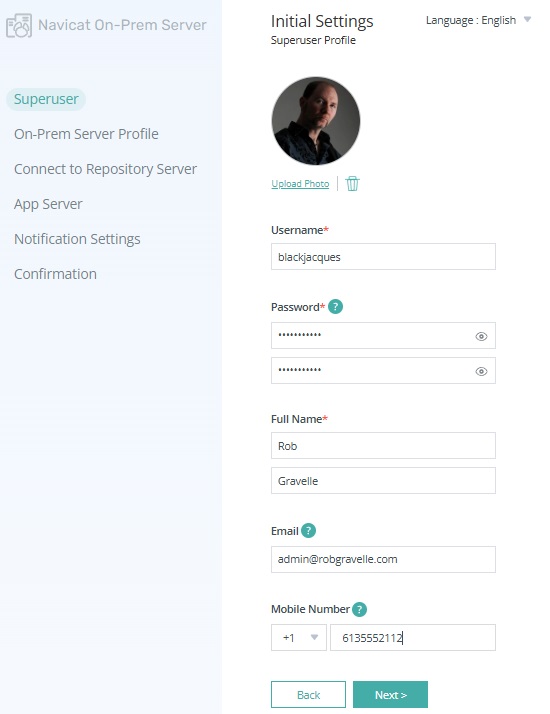
Once you've entered all of the details, click Next> to continue.
Set the On-Prem Server Profile
On the next page, you can provide a few details about the On-Prem Server such as the as the On-Prem Server Name and Company Name. You may upload a server logo image as well:
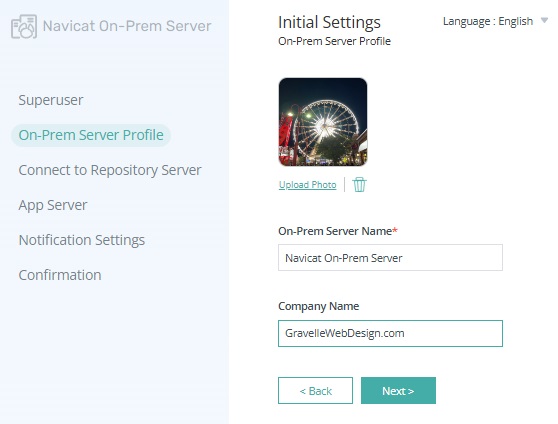
Click Next> to move on to the next screen.
Connect to the Repository Server
The repository database stores all user information and Navicat objects. Supported databases include:
- MySQL
- MariaDB
- PostgreSQL
- SQL Server
- Amazon RDS
Ideally you should allocate a separate instance to act as the repository database. Moreover, it should not reside on a production server.
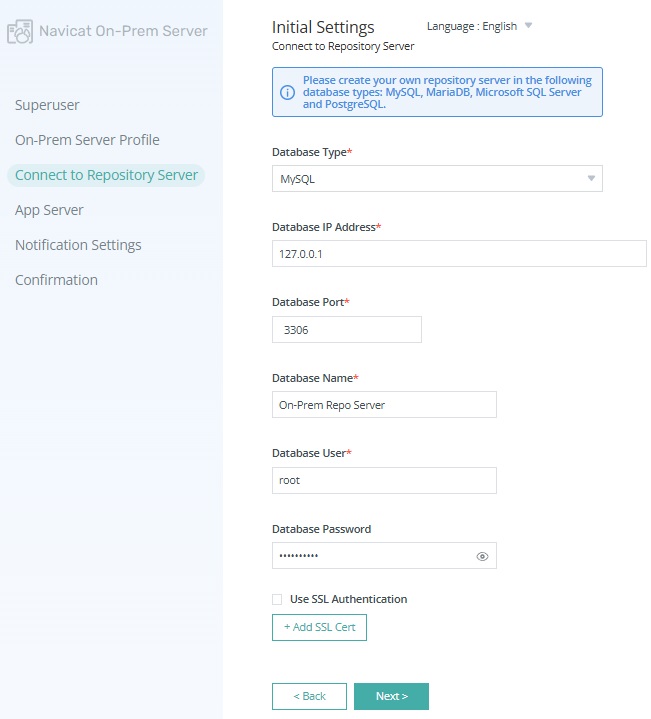
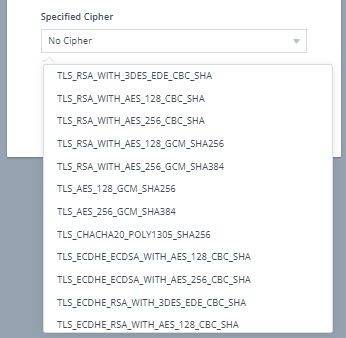
For greater security, you can use SSL authentication and specify the type of encryption cipher to use. Many of the common cipher suites are supported, including TLS_RSA_WITH_AES_128_GCM_SHA256, TLS_RSA_WITH_AES_256_GCM_SHA384, TLS_AES_128_GCM_SHA256, TLS_AES_256_GCM_SHA384, TLS_CHACHA20_POLY1305_SHA256, and others.
Going Forward
In Part 1 of Getting Started with Navicat On-Prem Server, we went over how to configure the Superuser, On-Prem Server Profile, and Repository Server on Windows 10 with a MySQL 8 Community Server instance. The conclusion will cover the App Server, Notification Settions, and Confirmation.
Interested in giving Navicat On-Prem Server a try? You can download it for a 14-day fully functional FREE trial. It's available for Windows, macOS (using Homebrew), and Linux operating systems.


