SQLite is a lightweight, self-contained, and serverless relational database management system (RDBMS) that is widely used for embedded systems, mobile applications, and small to medium-sized websites. It is easy to set up, requires minimal configuration, and offers a powerful set of features for managing and manipulating data. In this guide, we will walk you through the process of getting started with SQLite, including installation and using the popular Chinook sample database for SQL examples.
Installing SQLite
Windows:
- Visit the SQLite download page at https://www.sqlite.org/download.html.
- Scroll down to the "Precompiled Binaries for Windows" section.
- Download the appropriate precompiled binary for your system architecture (32-bit or 64-bit).
- Extract the downloaded ZIP file to a location on your machine.
- Open the extracted folder and locate the
sqlite3.dllexecutable. - To make SQLite accessible from any command prompt window, add the folder containing
sqlite3.dllto your system's PATH environment variable.
macOS:
- SQLite is pre-installed on macOS, so there's no need for a separate installation.
- Open the Terminal application.
- Type
sqlite3and press Enter to start the SQLite shell.
Linux:
- Most Linux distributions come with SQLite pre-installed. If not, you can install it using your package manager.
- For Debian/Ubuntu:
sudo apt-get install sqlite3 - For Red Hat/Fedora:
sudo dnf install sqlite - For Arch Linux:
sudo pacman -S sqlite - Once installed, open the terminal and type
sqlite3to start the SQLite shell.
Using the Chinook Sample Database in Navicat
- Download the Chinook database ZIP file and extract its contents.
You will find a file named
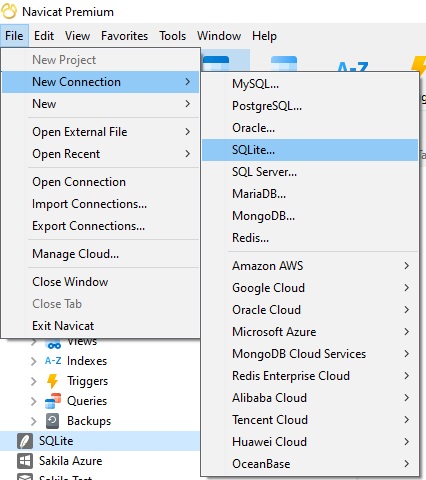
chinook.db. Let's create a new database connection in Navicat. - Select File -> New Connection -> SQLite... from the main menu to launch the New Connection dialog:
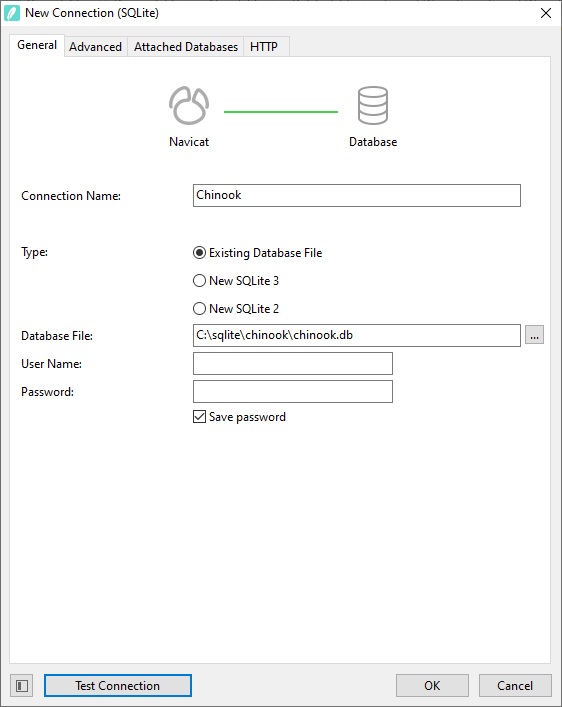
- In the dialog, enter "Chinook" for the Connection Name and then click on the Ellipsis button [...] to navigate to the Database File.
Click the Test Connection to verify that we can connect to the database. (Note that the Chinook database does not require a user name or password):
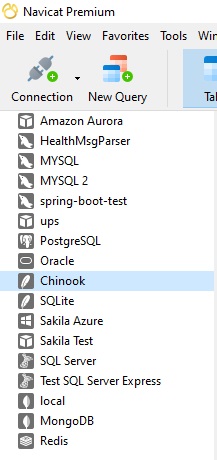
- Click the OK button to close the dialog. You should see our new connection in the Connections pane:
Basic SQL Operations with Chinook
Connecting to the Chinook Database:
Now that we've created a new connection for the Chinook database, let's open the connection so that we can interact with the database. To do that:
- Locate the Chinook item in the Connections Pane and click on it in order to highlight it.
- Select File -> Open Connection from the main menu. That should show the main database.
Querying Data
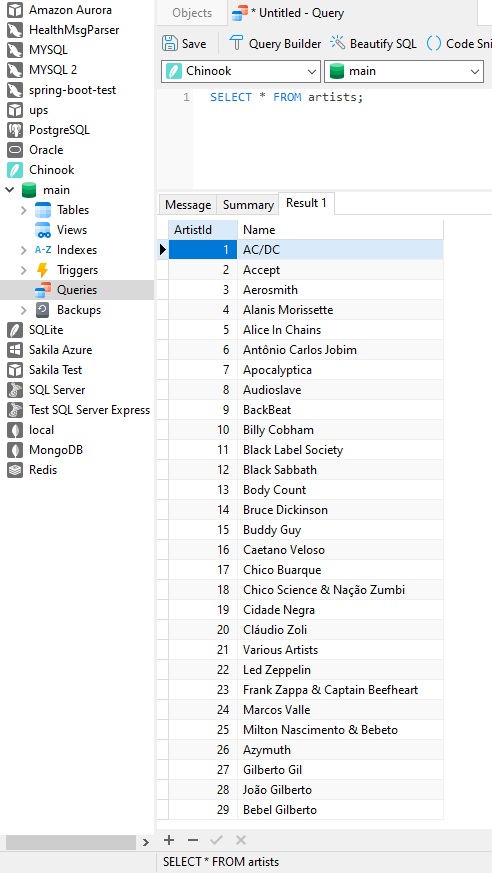
To retrieve information from the Chinook database, you can use the SELECT statement. For
example "SELECT * FROM artists;":
Filtering Data
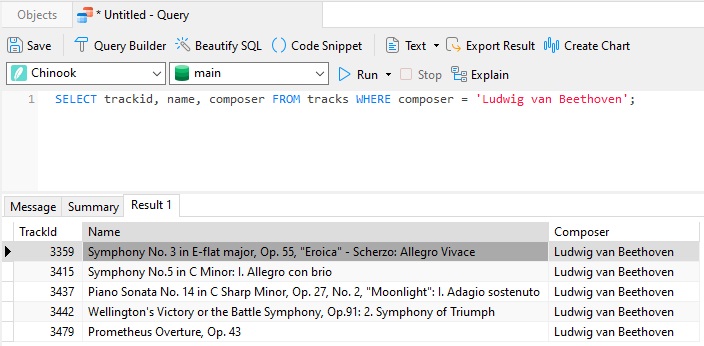
Filtering allows you to narrow down your results. For instance, try "SELECT trackid, name, composer FROM tracks WHERE composer = 'Ludwig van Beethoven';":
Updating Records
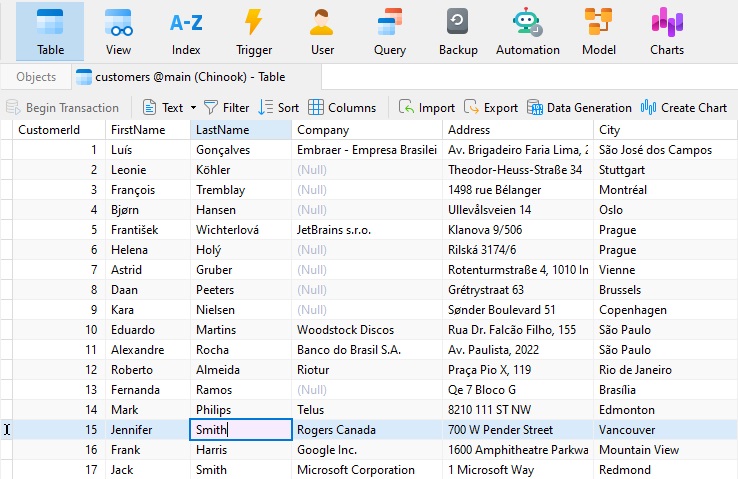
To update existing data, we can use the UPDATE statement, or simply edit the data in place!
Inserting Records
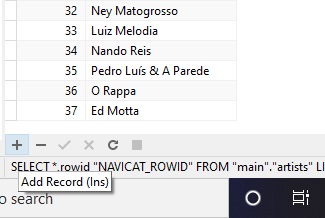
To add a new record, no need to use the INSERT statement; in Navicat, we can simply click the Add Record button:
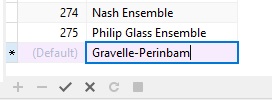
That will append a new empty row to the table, ready for data entry:
Deleting Records
Deleting a record in Navicat is equally straightforward; just highlight the row to remove and click the Delete key. A dialog will appear, asking for confirmation:

In today's blog, we learned how to get started with SQLite, including the installation process and how to perform basic SQL operations against the popular Chinook sample database. Whether you're a beginner or an experienced developer, SQLite's simplicity and versatility make it an excellent choice for various applications. Moreover, Navicat for SQLite (or Navicat Premium) 16 is the perfect tool to explore SQLite's more advanced features and capabilities and to efficiently manage your data.


